You can dig trench a safe, efficient trench without guessing—plan the depth, pick the right tools, and follow simple safety steps to protect yourself and the project. Know the purpose, measure the length and depth you need, and choose the proper hand tools or a trencher before you put blade to soil.
This guide shows practical steps for digging trenches and the safety best practices that keep the work compact, compliant, and damage-free. Follow along to learn tool choices, trenching technique, spoil placement, and the precautions that prevent costly mistakes.
Steps to Dig Trench
Need to understand dig trenches. Plan carefully, confirm utility locations, pick tools sized to the trench, and use the right excavation technique for soil and depth. Safety, accurate layout, and controlling water or collapse risk determine how fast and clean the trench will be.
Assessing the Site
Start by calling your local utility locating service to mark underground lines; never begin until those marks are visible. Inspect the site for slopes, trees, nearby structures, and surface drainage that could affect trench stability or require additional shoring.
Test soil type by digging a small probe hole or reviewing local soil maps. Clay, sand, and loam behave differently: clay holds steeper walls, sand needs sloping or benching. Note groundwater level; if water appears within 24–48 hours of probing, plan dewatering.
Check access for equipment and spoil placement. Keep spoil at least 2 feet back from the trench edge. Identify vehicle or foot traffic routes and set up barriers and signage to control the work area.
Marking the Trench Line
Measure precisely using a tape measure or laser distance meter and set stakes at regular intervals (every 5–10 ft for visibility). Run a string line between stakes at finished trench center or edge depending on your reference method.
Use spray paint or chalk to mark the ground over the string line so you can follow the path if the string shifts. Mark depth and any offsets for fittings or bends directly on stakes to avoid remeasuring while excavating.
For buried utilities or property lines, keep a written plan or sketch at the site showing distances to known features. Label changes in grade or locations where you will bench, slope, or place shoring so workers maintain consistent dimensions.
Selecting the Right Tools
Match tools to trench width, depth, and material: use a trenching shovel or narrow blade for hand-dug trenches under 2 ft wide. Bring a pick mattock for compacted soils and a flat shovel for cleaning the bottom.
For longer or deeper trenches, rent a walk-behind trencher or a mini-excavator with an appropriate bucket width. Choose buckets that produce the required trench profile: narrow for cable, wider for drainage pipe. Include a wheelbarrow, measuring rod, and tamper for finishing.
Personal protective equipment is essential: hard hat, steel-toe boots, gloves, eye protection, and a high-visibility vest. For trenches deeper than 5 ft, have shoring or trench boxes ready and ensure a ladder is present for every 25 ft of trench length.
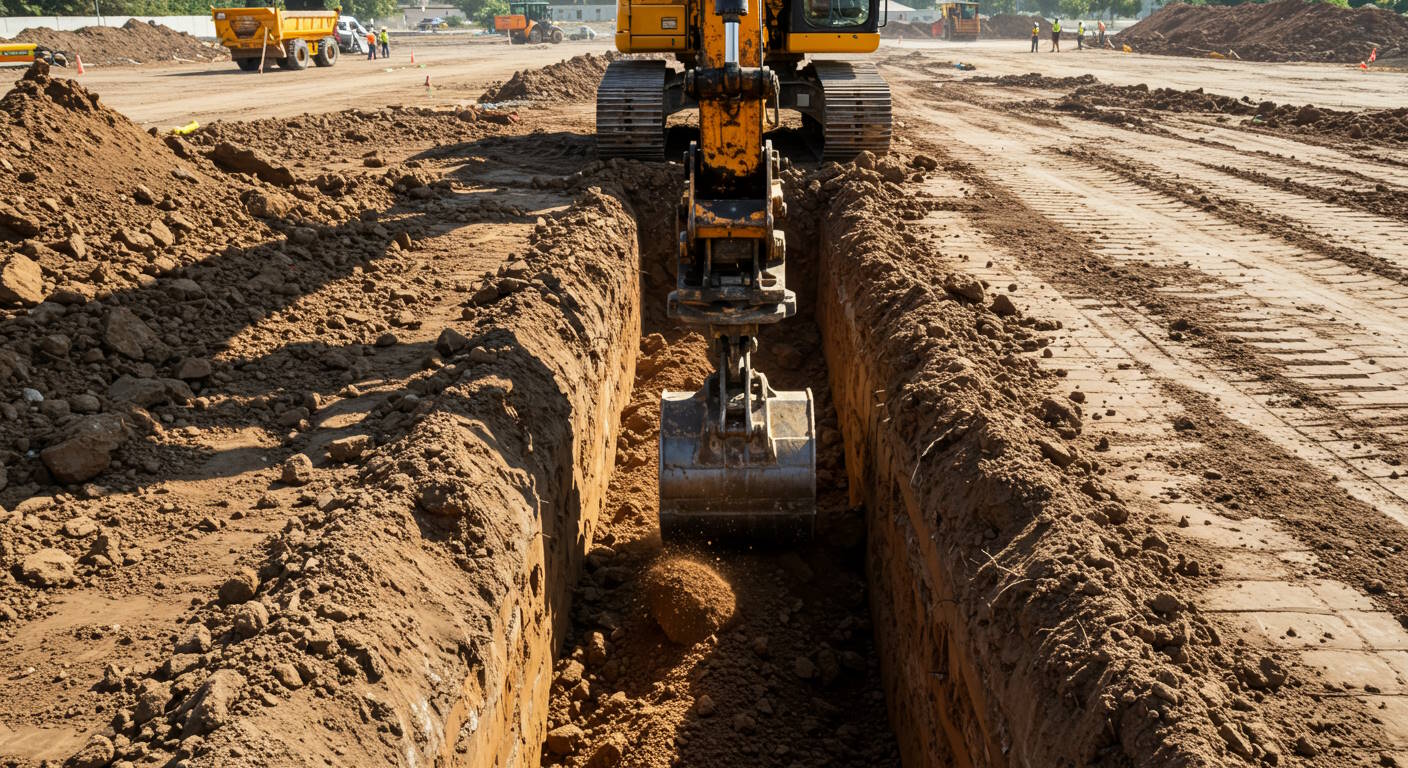
Excavation Techniques
Begin by removing surface sod and topsoil separately if you need to restore the area. Excavate in shallow passes rather than a single deep cut to control stability and see changes in soil strata.
For trenches under 5 ft in competent soil, use a straight vertical cut with sloping or benching where required. For unstable or sandy soils, slope the sides at the angle of repose or install shielding. Place spoil on the downhill side if on a slope to prevent undermining.
Maintain a clean, level trench bottom for pipe bedding: use compacted sand or crushed stone to achieve uniform support. Keep a ladder, inspect walls daily for signs of movement, and stop work if you detect cracking or bulging—secure or shore before resuming.
Trenching Safety and Best Practices
You must control hazards from equipment, falling materials, and collapsing soil. Use the correct gear, verify ground conditions, and account for weather, utilities, and surface water before and during work.
Personal Protective Equipment
You must wear a hard hat with a chin strap when machinery or spoil piles are nearby. Use high-visibility clothing so equipment operators can see you in low light or dusty conditions.
Protect your feet with steel-toe, puncture-resistant boots and wear gloves rated for the tasks — cut-resistant for handling rebar, heavy-duty for moving timber or metal. Use eye protection and hearing protection when grinding, cutting, or operating loud equipment.
Provide fall protection if you work near open trench edges deeper than your organization’s trigger depth. Have a first-aid kit and rescue equipment (non-entry retrieval system or ladder) immediately available and ensure workers know how to use them.
Soil Stability and Shoring
Classify soil before you dig. Test for granular vs cohesive soils and look for water table depth; those factors determine whether sloping, benching, or shoring is required.
Install protective systems designed or approved by a competent person. Use trench boxes or engineered shoring for trenches where sloping alone won’t meet safety requirements. Anchor and brace shoring components to prevent movement when heavy equipment operates near the trench.
Keep spoil piles and heavy equipment at least 2 feet from trench edges. Inspect trenches at the start of each shift, after rain, and after any event that could change stability. Stop work and evacuate the trench if you notice cracks, bulging, or sudden water infiltration.
Environmental Considerations
Call 811 and verify utility locates before you break ground. Mark known utilities and confirm depths with test holes or potholing when marks are uncertain.
Control surface water with pumps, ditches, or berms to prevent undermining trench walls. Monitor weather forecasts and suspend open-trench work if heavy rain or rapid thaw could create hazardous conditions.
Manage contaminated soils according to local regulations and use appropriate PPE and decontamination procedures. Limit dust with water spray and establish erosion controls to prevent sediment runoff into storm drains or waterways.